Alright, enough already. It’s time to get up and moving. After you read this article, get off the couch, and go shoot some photos. Your skills and artistic eye is only going to get dustier and dustier the longer they go unused.
Actually, so is your gear.
You know what can happen to your gear if it’s stored improperly, but maybe you just need to give your camera and lenses a little clean-up and maintenance. While you’re cracking open the windows, why not give your photo gear a little spring cleaning at the same time?
Think your stuff is pretty clean? Well, it’s still a good idea to prevent future damage. Using your equipment a lot, traveling, changing lenses or getting caught in any kind of wet, rainy weather can introduce dust, dirt or unwanted moisture to your stuff. You’re going to want to get that gone before it can sneak into your camera body or between your lens elements.
Every photographer swears by their own cleaning methods, and undoubtedly somebody’s going to disagree with me here, but read on to see how I suggest you give your stuff a thorough cleaning.
Video Walkthrough
If you’ve got the time, take a peek at this video we made for you and follow along as I clean and disinfect my own camera and lens.
 Tools
Tools
Alright, so fire up the pressure washer.
I’m kidding. Don’t do that.
You do, however, want to use the correct tools for the job. To keep your equipment clean and healthy, I recommend the following—
Rocket Blower
This thing may look ridiculous, but trust me when I say that it’s one of the best tools for removing dust from your lens or sensor. The nozzle allows you some precision, so point it at that stuck piece of fuzz and gently squeeze the bulb to blast it into oblivion. I’ve seen some people use compressed air for the same purpose, but if you aren’t careful, canned air can spray liquid microdroplets on your glass or sensor, and leave behind hard-to-clean spots.
Lens Cloth or Wipes
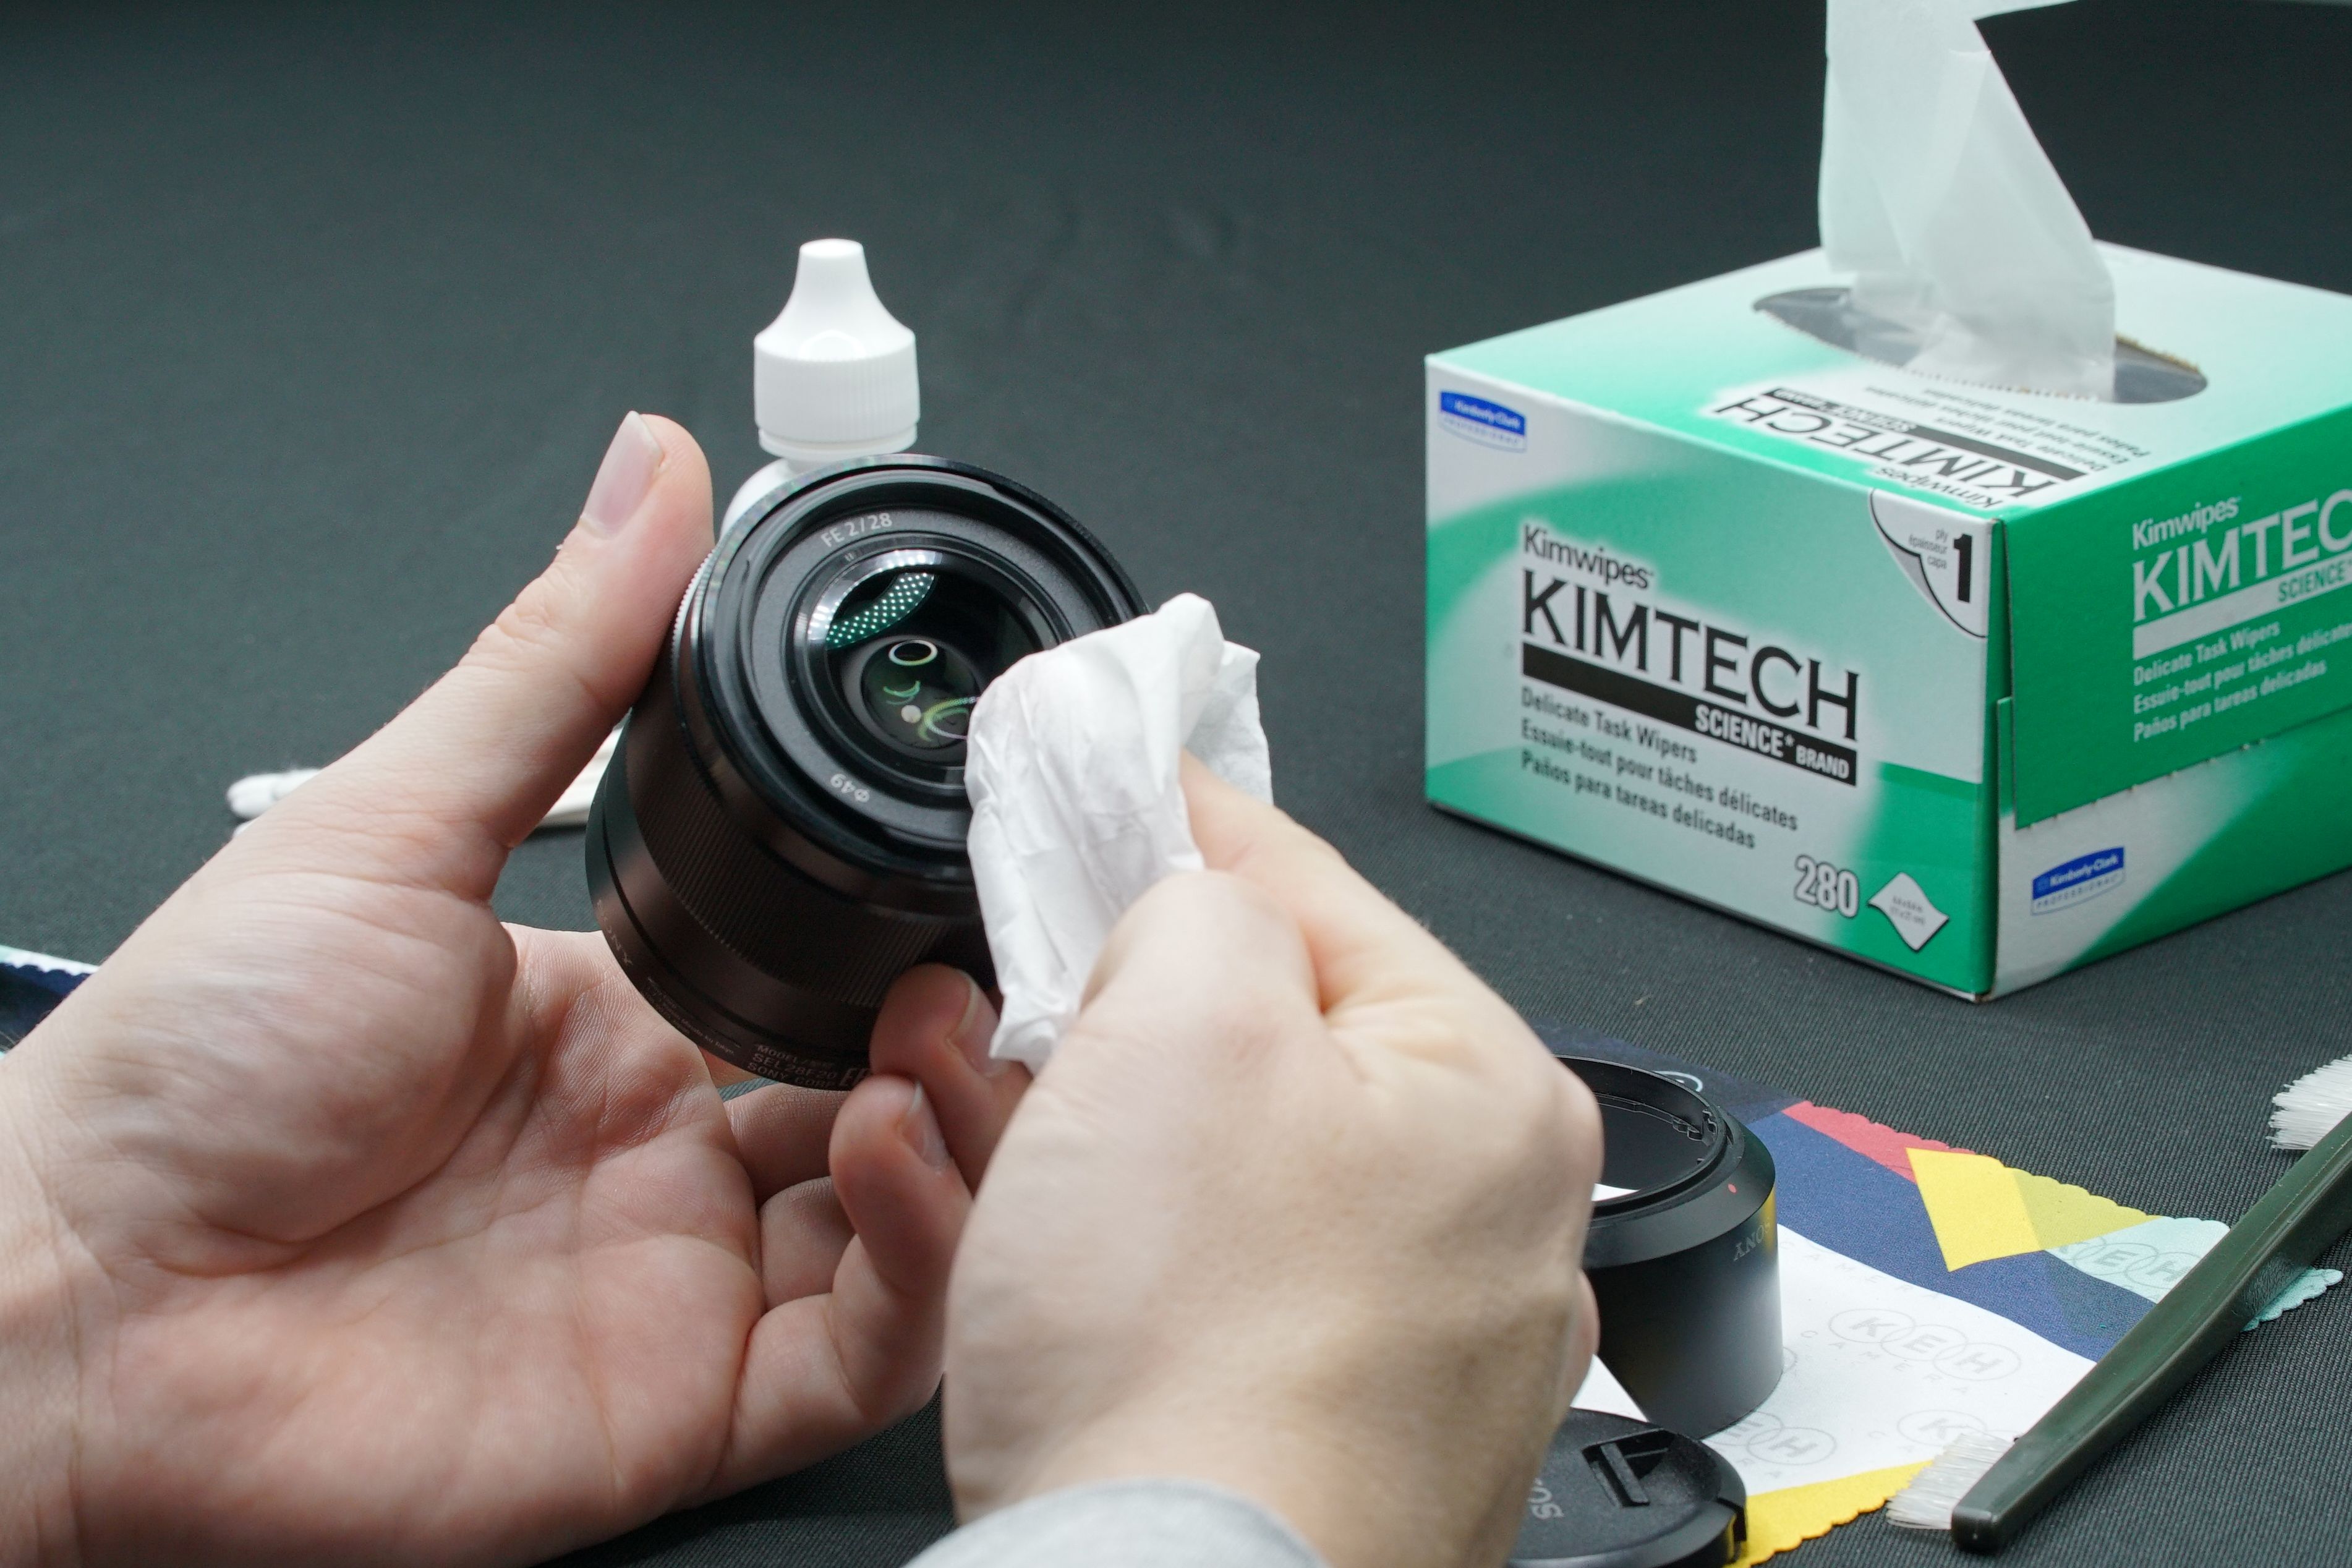
Zeiss makes pre-moistened lens wipes that work well for cleaning off the front and back of your glass. Here at KEH, we typically use Kimtech Science Kimwipes. The important thing is to use a soft, lint-free cloth or wipes. Facial tissues or pocket-handkerchiefs aren’t going to cut it.
A microfiber lens cloth is good for this situation also. These can pick up dirt and oil without scratching the lens surface. They’re also good for getting the occasional face smear off of the rear LCD screen of your camera.
Lens Cleaning Fluid
Sometimes you’ll get some funk on your lenses that are too stubborn to come off with an air blast or a gentle wipe. Let’s say you were in the middle of a bucket of extra-buttery popcorn when you decided to change lenses. For this, you’ll need to add a little moisture. You’ll want to use a special liquid for this—not Windex, alcohol, or spit. Many straight glass cleaners are too harsh and could eat away at your lens coatings. Personally, I like to use Pancro Professional Lens Cleaner. Our lens experts here use a super-secret cocktail, handmade in-house.
Brushes
Ideally, you’ll want two brushes. The first should have long, soft bristles like a makeup brush to gently sweet away dirt & dust from all the thinnest crevices. One with short and firm bristles, like a toothbrush, to get in there and give your camera body or lens barrel a gentle scrub if necessary.
Microfiber Cloth or Towel
I mentioned one of these earlier when talking about wiping off your lens, but you may want a larger, secondary lint-free microfiber towel to wipe all the dust and nose grease off of your camera body.
 Lens Cleaning
It’s go time. Try to do your cleaning in a fairly dust-, moisture- and wind-free environment instead of, say, the beach.
Take your lens and remove the front and back caps. Use the firm brush to knock any dirt or dust off of the lens barrel, making sure to brush any dirt or grit out of the zoom, focus and aperture rings and mount areas. Carefully do the same around the filter thread areas at the front of the lens, but don’t brush against the glass elements with this firm brush. Also take this time to clean the dust out of the interior of your lens caps. Cleaning your lenses won’t do much good if you immediately put a dusty lens cap back on them.
Next, use the soft-bristled brush to clean the more delicate areas. Then use the rocket blower to get any dust or debris off of the front or rear glass elements. You’ll want to do this before pressing a wipe or cloth against the elements, since rubbing even a small piece of hard sand against the glass could cause irreparable scratches.
Once the glass is sufficiently debris-free, give your wipe or cloth a spritz of your lens cleaning liquid. Don’t spray directly onto the lens, since the liquid can actually flow around the outside edge of the glass and potentially dry on the backside of the front element, leaving an uncleanable film. Gently rub the glass in a circular pattern, starting in the center and working your way to the outside. You may have to take a second, dry wipe to completely get the liquid off or buff off any residue.
Finally, replace the caps and give the outside barrel a good wipe with your microfiber towel to remove any dust or nervous-sweaty fingerprints. Whatever you do, don’t just wipe the lens on whatever shirt you’re wearing—who knows where that’s been? Alternately, if you do plan on implementing this shirt-cleaning mether in the field where you won’t have access to dust- and lint-free wipes, consider using a protective filter on the front of your lens so your animalistic wiping won’t damage your lens.
 Body Cleaning
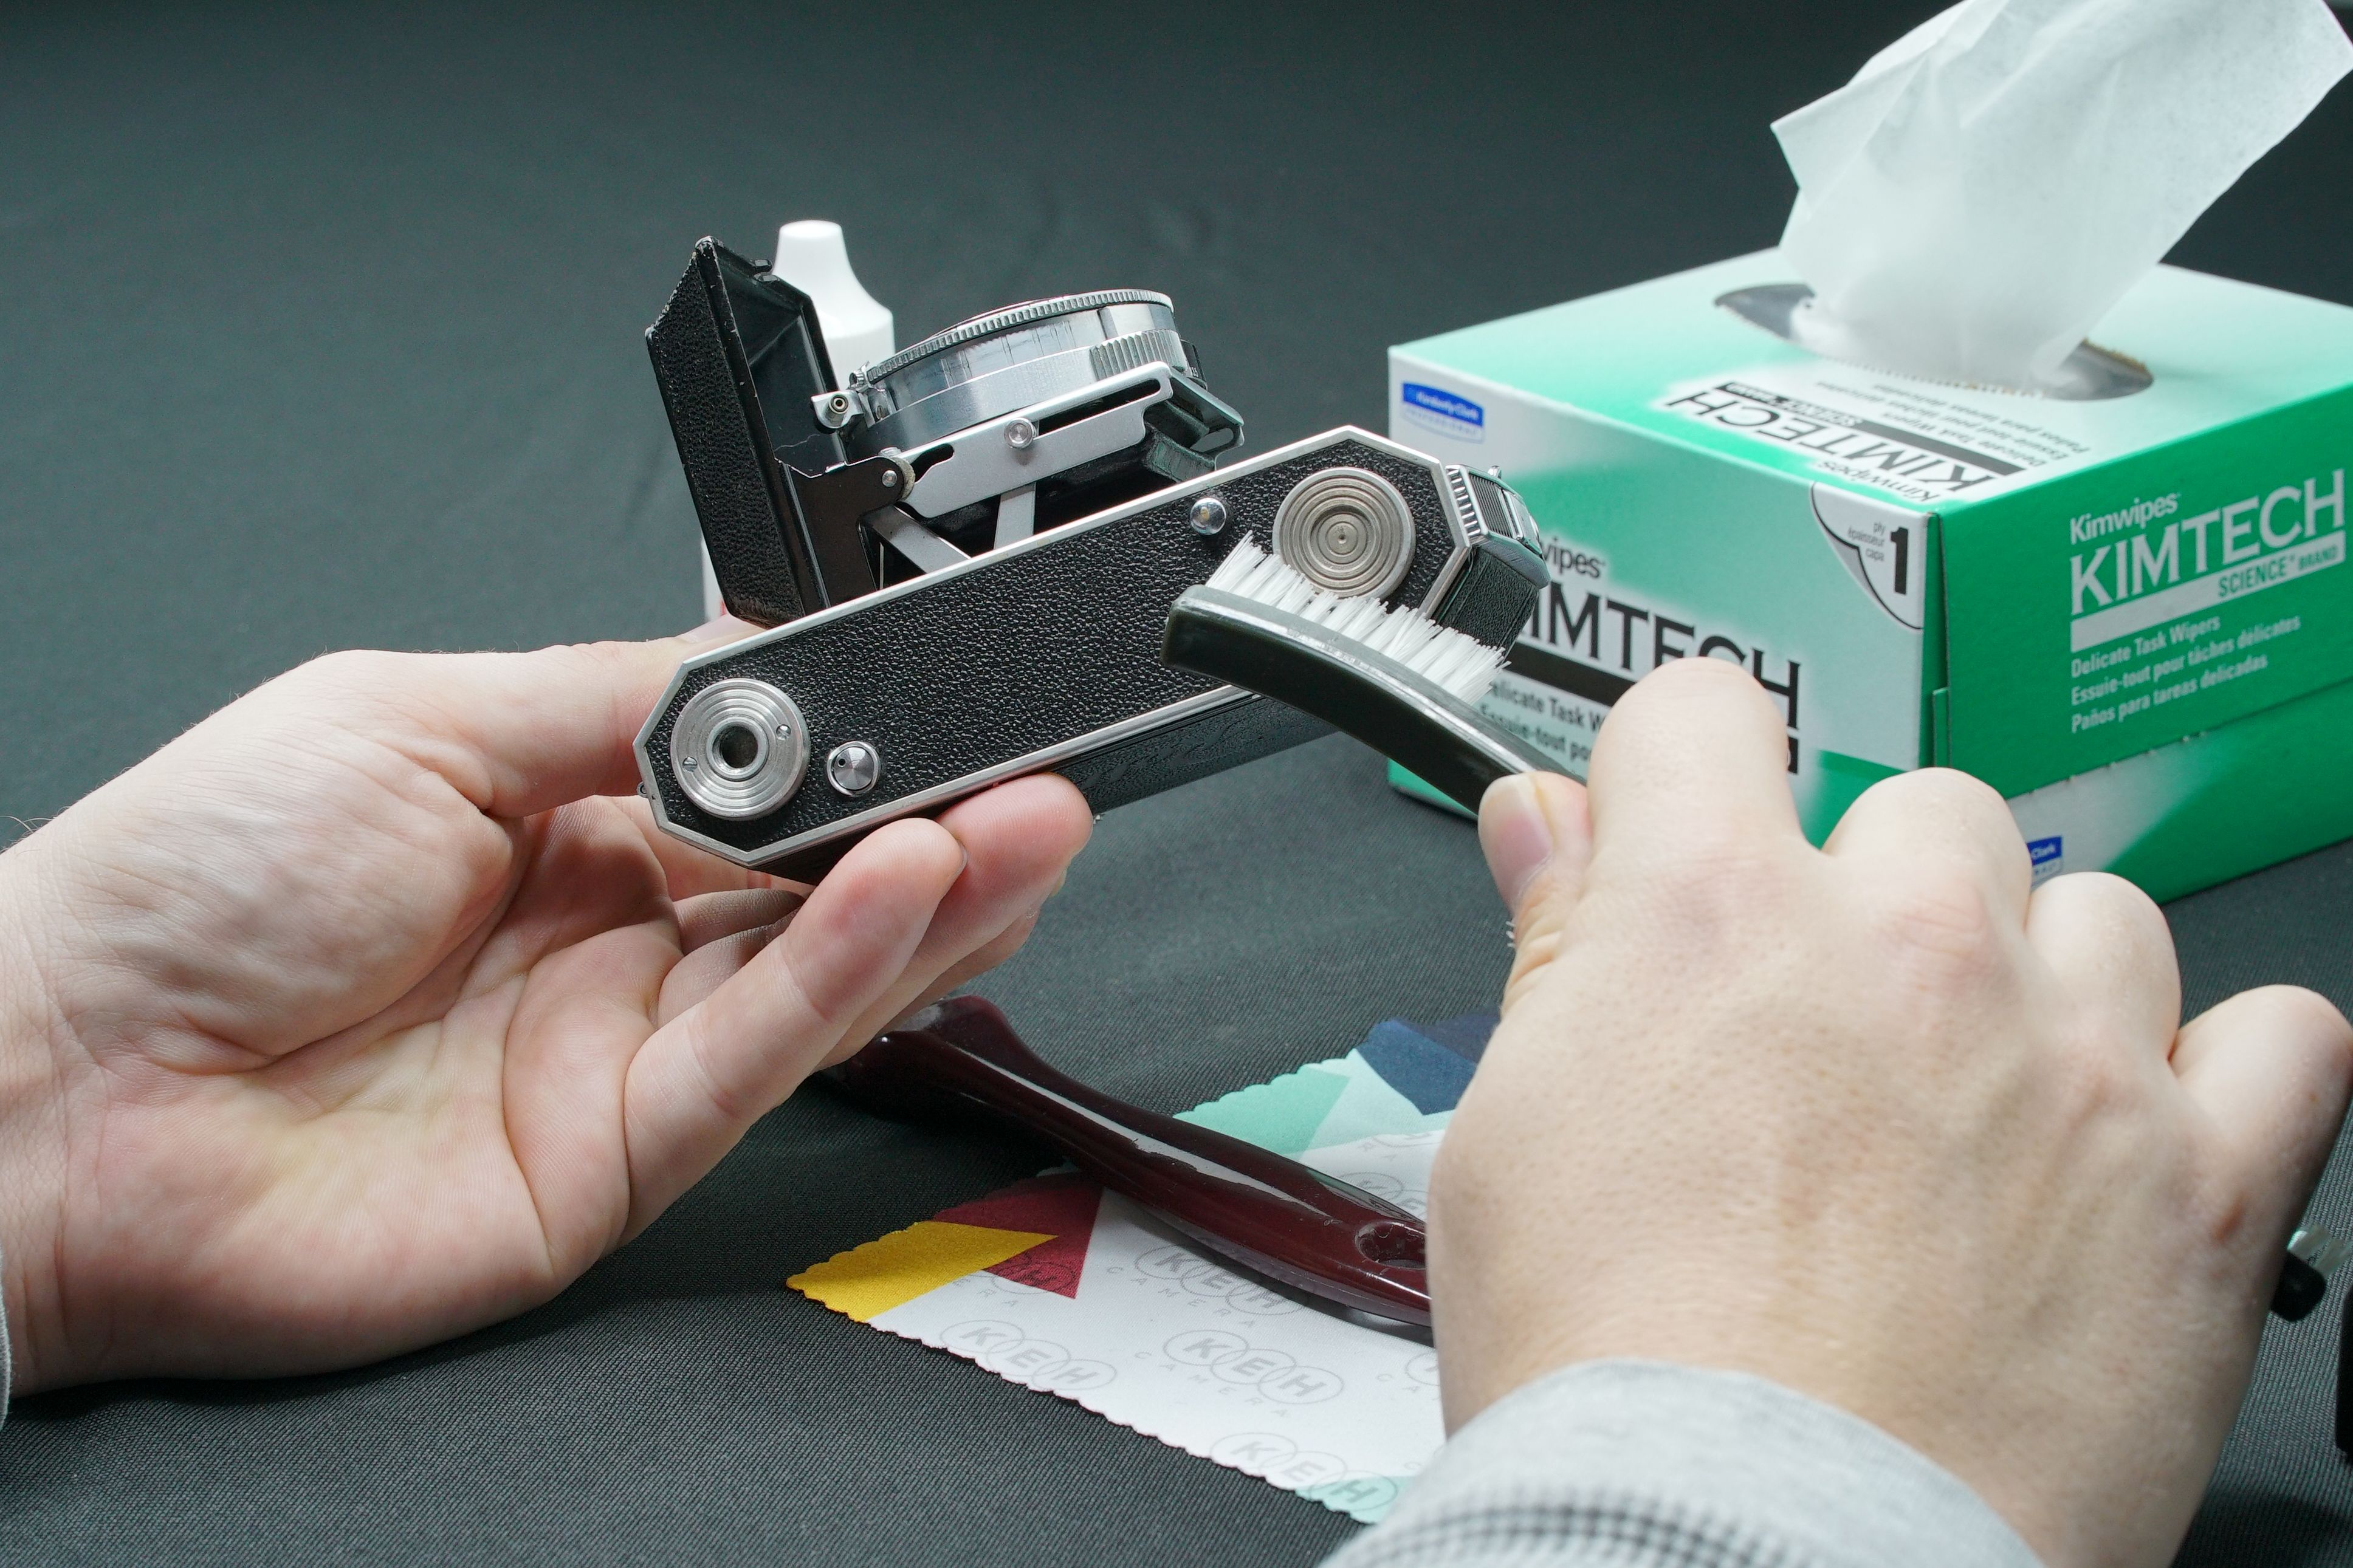
Here, you’re going to want to follow the same kind of protocol as above. Start with the firm brush, knocking away any sand or grit from moving areas like your dials, film advances or shutter release buttons.
You can be a little more lenient here with your scrubbing and use a gentle diluted soap mixture if there’s are any sticky spots or stubborn gunk on the bottom or sides of your camera. A toothbrush will work well for getting off goop from old stickers. Just be extra careful anywhere there’s a seam, screw or moving part. Any kind of moisture is bad news when it comes to the complicated internal machinery and electronics of your camera.
Use the longer-bristled brush to sweep away dust from those spaces you can’t quite reach with a cloth. If you’re using a film camera, use a wooden toothpick to gently lift spare pieces of broken film out of crevices inside the camera body. You can use a cotton swab to clean any smudges off of your viewfinder glass, and lastly, give the whole thing a wipe down with your microfiber towel to get rid of fingerprints and dust.
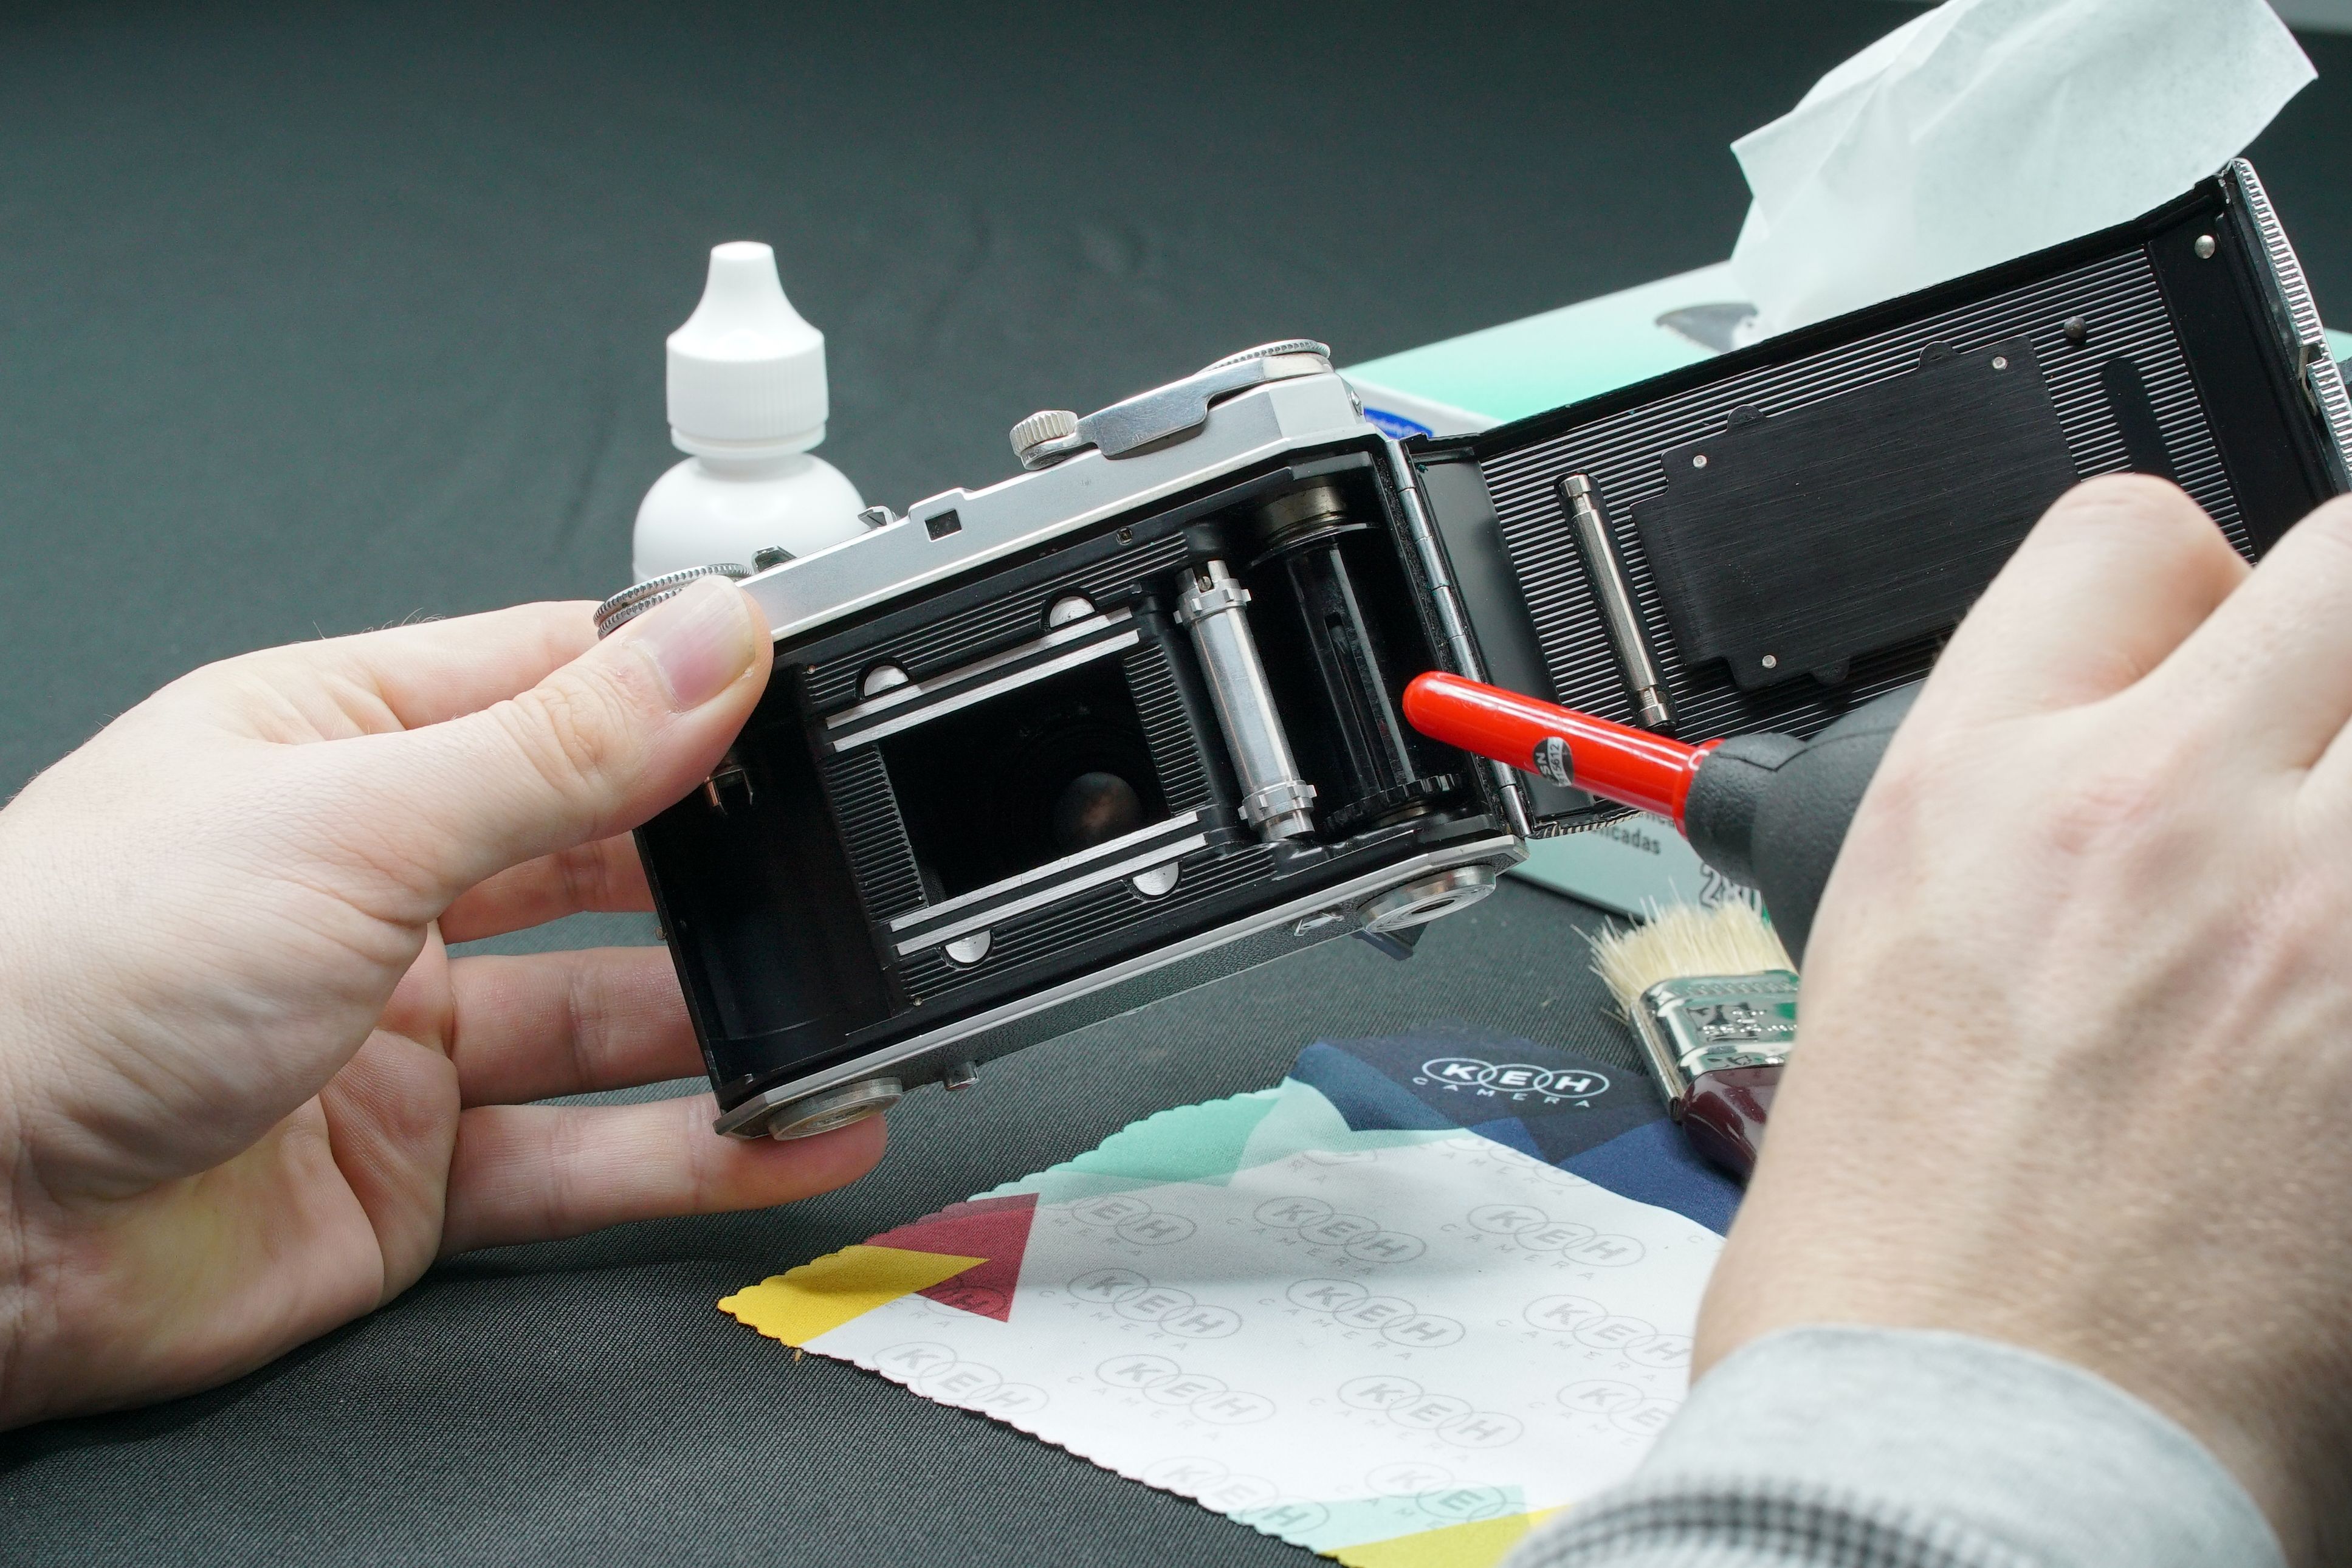 Sensor Cleaning
Let’s talk about sensor swabs for a second. There are a number of companies out there that make specialized tools for cleaning off a dusty or dirty sensor. I really recommend that only seasoned professionals take sensor cleaning into their own hands. It’s too easy to ‘bump’ the sensor with a hard piece of plastic and scratch or irreparably damage it. You could also press too hard when cleaning, or leave some cleaning fluid on there and make a manageable problem much, much worse.
Most of the time, a simple blast of air from the aforementioned rocket blower should get rid of any excess dust. For deeper, more intense sensor cleaning, I suggest taking it to a repair clinic or sending it to us so you don’t end up damaging your gear accidentally.
Following this guide should get you to a good place when maintaining your equipment. Don’t be fooled into thinking just because it’s dirty or dusty, it’s dead. Most of the time, your camera equipment just needs a little love and it’ll be back to working condition. A lot of this stuff was built to last, and we’re here to prove it.
See How To Store Your Gear to prevent damage and degradation


