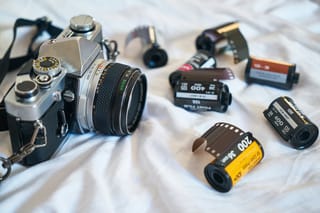
As a hybrid shooter, I typically treat film and digital cameras very different. Film tends to be slow paced and methodical while digital can lend itself to a spray-and-pray mentality. This has less to do with the physical hardware and more with the aspect of cost.
Depending on the film I am shooting, I mentally value each click anywhere from 50 cents a shot
with 35mm to $2 for medium format (cost of film + lab development + lab scan) and up to $5 a
shot for large format (cost of film + lab development and no scan). With the dollar figures up
there, there is little to no wasting of frames. I check and double check my settings, focus, and
frame before depressing the shutter release to ensure a proper exposure.
I used to be fairly careless when swapping over to digital. Fire off a few test shots to check exposure before shooting a scene, then shooting a blistering array of images as memory is nearly free. I’d often “chimp” to make sure I liked what I was shooting; making constant adjustments on the fly. The result would be dozens of shots of the same scene with various small adjustments. This made my shooting a lengthier process than it needed to be.
Also, this brought up an issue during post work. Say I did a shoot with my medium format
camera, which only has 10 exposures per roll. If I took a few rolls of carefully thought out and
planed images, I’d have a keeper rate (meaning those I’d post / print / sell) of around 90%.
Shooting the same series of images with digital, the images would number in the hundreds with
a keeper rate down around 5%. I haven’t even factored the time spent culling and editing into
this process. What it amounts to is a lot of wasted effort on my part.
One day I thought, what if I treat my digital work more like my film work? Would it slow me down and give me more thoughtful imagery? So, over the last few years, I gradually changed my
digital workflow and treated it more like my film and I couldn’t be happier with the results. I’ve
been taking about 1/10 the exposures I usually would and they have a higher keeper rate
(closing in on about 75-80% on average).
Take the Time to Find the Best Frame
I walk around a scene to view it from various angles, looking through the finder for the optimum
shot. I pay attention to where the light may flare and how evenly it lays across my subject,
foreground, and background. I like to see what stray objects may be entering the scene (think
telephone poles and other distractions). With film, I know I am only taking one or two exposures
so if I don’t catch the distractions now, they’ll be a bear in the long run to edit out. If I treat digital the same way, I am not relying on catching a small distraction on the rear screen. I know I am paying extra attention to detail before I take the shot. More attention means less wasted shots
and less post work.
Meter For the Light
As digital highlights are not nearly as forgiving as film, I am a big fan of using the histogram to
ensure I capture all the data I can without clipping. Modern digital meters are good, but there’s
nothing I trust more than the histogram.
I should explain the histogram a little here:
A histogram depicts the range of tones in an image from the darkest on the left of the graph to
the lightest on the right side; with the midtones in the middle. Anything beyond the left or right
side is beyond the ability of your sensor to record. When viewing on a modern digital camera,
there are a few histograms you can view. The one I use is the luminosity histogram that
evaluates the overall brightness of the scene. There are also 3 separate color histograms which
display the red, blue, and green pixels of your sensor. For this discussion, I am talking about the
brightness or luminosity of your scene – represented with a (usually) white histogram on your
camera’s EVF and/or rear screen.
On my Sony, I have the histogram enabled in the EVF as a small overlay in the bottom right
corner. I give it a quick glance to test where my highlights and shadows are sitting for the scene.
I am looking for something like the middle graph to the right (just pay attention to the grays). The goal here is to not have the data slam into either “wall” of the histogram. If data is touching
either side, you’re clipping.
To explain the visual on the right (though they are out of Lightroom for ease of capture), here
are what each means:
- Data touches shadows wall (left) – shadows underexposed
- Data not touching the walls – no clipping in scene
- Data touches highlights wall (right) – highlights overexposed


When the shadows are underexposed, you’re not able to rescue them. The data is beyond the
graph, and therefore, not recorded (clipped). You get the opposite effect when you overexpose
the highlights. The data wasn’t recorded and the highlights were clipped. In the middle graph
example, the tones are very even across the scene and not touching the walls.
When viewing these in Lightroom, the little triangles at the top show white, signaling you’ve
screwed up. You may have heard people talk about the in camera “blinkies” that can also show
through live view and display via flashing colors what you’re about to clip. It’s an alternative and
quick way to see if you’re capturing all the data you can in a scene.
Don’t confuse data-heavy graphs to the right or left with proper exposure and clipping. Again,
the histogram is overall brightness of the scene. So data heavy left means a dark scene, but if
it’s not running into the wall, you’re not clipping. Just a dim scene. Same logic with a right-side
data heavy graph is just a bright scene.
Granted, a good balanced histogram doesn’t mean a good picture, it just means you’re
capturing all the data that you can with your sensor.
So, with an image metered within a balanced histogram that doesn’t clip, I know I have a solid
exposure I can easily work with in post.
Take the Shot
When I know my frame and light are good, I adjust the focus as the final step and take the
image. Usually just one, sometimes two.
On my digital camera, I have the rear LCD turned off to treat it more like a film back. Note I do
not (usually) look at a preview of the image I took. I am confident that if my histogram, frame,
and focus were where I wanted them then I have a good exposure and can move on.
This whole process has resulted in a much smaller library of images to work with from each
shoot, but a library of properly exposed images. The culling and editing becomes a streamlined
process that closely mimics that of my film process.
For my style, slowing down is important and good for the soul. I enjoy getting everything I can
out of the experience and feel I have better images to show for it. This method doesn’t work for
everyone out there, especially if putting food on the table depends on that perfect action shot.
But if you can go at your own pace why take a lot of images you’ll never use when you can take
a few that will shine?


