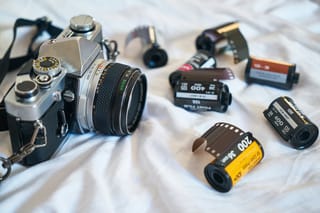
As previously established, every photographer should shoot film. But as much as I believe in that tenet, I would never suggest to anyone that they should limit their scope solely to the analog world. It’s perfectly acceptable after getting your film developed to turn your precious emulsions into sterile ones and zeros—actually, it’s more than acceptable, it’s encouraged.
Storing photos, for one, is way more convenient in the digital realm. Cataloging thousands of images on small, portable, and—most importantly—duplicable hard drives is more space-conscious than hoarding a couple dozen folders of negatives, or clunky file cabinets full of prints.
Redundancy is critical when dealing with important work like your photos, and while you should definitely hang on tightly to your negatives and keep making prints, it’s also nice to have digital files as backup and to do more advanced editing. Also, it almost goes without saying, it would be a shame not to digitally share your film snaps with all your Instagram pals—get dem likes, fam!
Fortunately, most photo labs (including all the ones on our mega list of places to get your film developed) offer digital scans. But what if you develop at home, demand more editing control or just want to get better quality scans than your lab offers?
If that’s the case, you need to start scanning your own negatives, and luckily, you don’t need a fancy Nikon Super Coolscan and some outdated software to do it. You probably already have most of the equipment you need—a digital camera, a lens and a tripod will get your started, and this setup can produce tremendous results. Let’s go through the specifics.
Camera/Lens
Basically, all you need is a digital camera. Of course, the higher megapixel sensor the better, as you’ll be able to make higher-resolution scans. These days, as most digital cameras are at least over 12-megapixels, you’re probably fine with what you have.
Would a 50-megapixel sensor be overkill? Heck no. But is it necessary? Hardly.
More important than your pixel count is a lens that can focus as close to the film as possible, so you can fill the frame and take advantage of every one of those pixels. A macro lens is ideal, as they are designed to get really close, and often have a 1:1 magnification ratio. This means that if something is two centimeters long in real life, it’ll take up two centimeters of your sensor at the closest focusing point, replicating your subject’s scale.
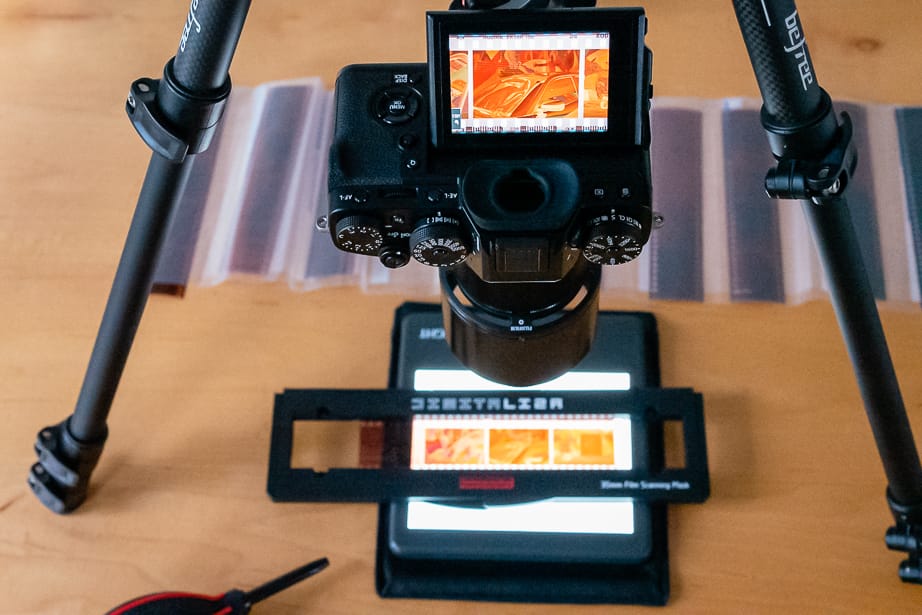
I like to include the film sprockets in my scans in case I want to show them as part of my image
I use my main current camera, a Fujifilm X-T3, whose 26.1-megapixels is more than plenty for my needs. For the macro lens, I opt for my old-but-trusty Fujinon XF 60mm f/2.4. It’s not a true 1:1 macro (more like 1:2), but it gets the job done.
You don’t have to own a DSLR or mirrorless interchangeable-lens camera—some point and shoot or bridge cameras can be used for this as well. Again, you just want to be able to focus as close to your film as possible, because if you end up having to crop a lot of your digital frame, you’ll lose resolution and end up with subpar results.
The Accessories
You could just stand over your negatives and take a picture, but for the best outcome, you’ll need a few accessories. First off, you need to backlight the film to draw out all the details in your exposure, so this requires a light table.
Obviously, if you have an actual light table, that works best. In a pinch, you could use a tablet or a laptop—just pull up a white screen (a blank page in a word-processor, perhaps), crank the brightness level all the way up and it should get the job done, although it won’t be quite as bright as a proper light table.
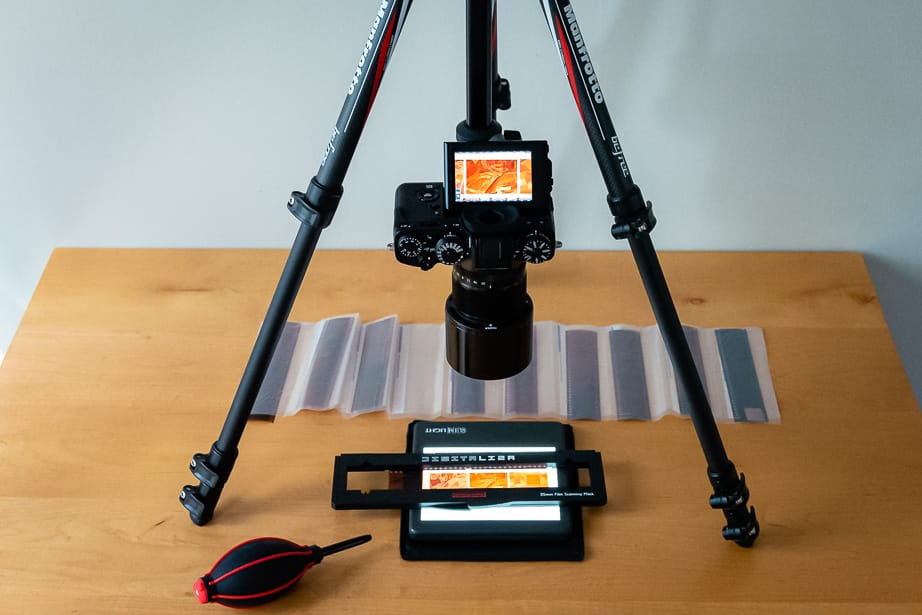
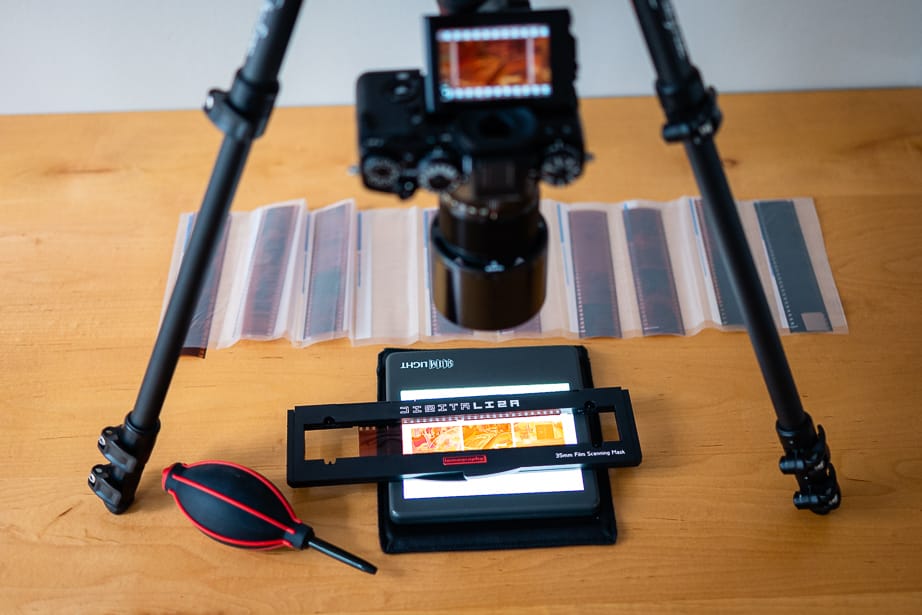
My full setup for film scanning
The second accessory you’ll need is a tripod. Preferably one that can switch its vertical column to be able to shoot straight down. I like to use my Manfrotto BeFree Carbon Fiber tripod because it’s easy to set up and is small enough to be used for my tabletop operation.
Setting up your camera on a tripod will improve your consistency and speed, making the whole process easier and more efficient. Just make sure your camera is set up to be parallel with the film before you start shooting. If you’re at a slight angle, your scans will come out a bit wonky. Our friend, Matt Day uses a copy stand instead of a tripod in this video showing off his setup, but he still has a tripod head on it to fine tune things.
Lastly, it’s nice to have something to hold the film strip as flat as possible, so you won’t get any weird distortion effects to your scans. Often times, flatbed scanners come with film strip holders, otherwise our friends at Lomography make these really cool scanning masks (for 135 and 120 film) that allow you to scan panoramic shots as well. This accessory isn’t entirely necessary, but again, it’ll make your life a whole lot easier and you’ll get better results.
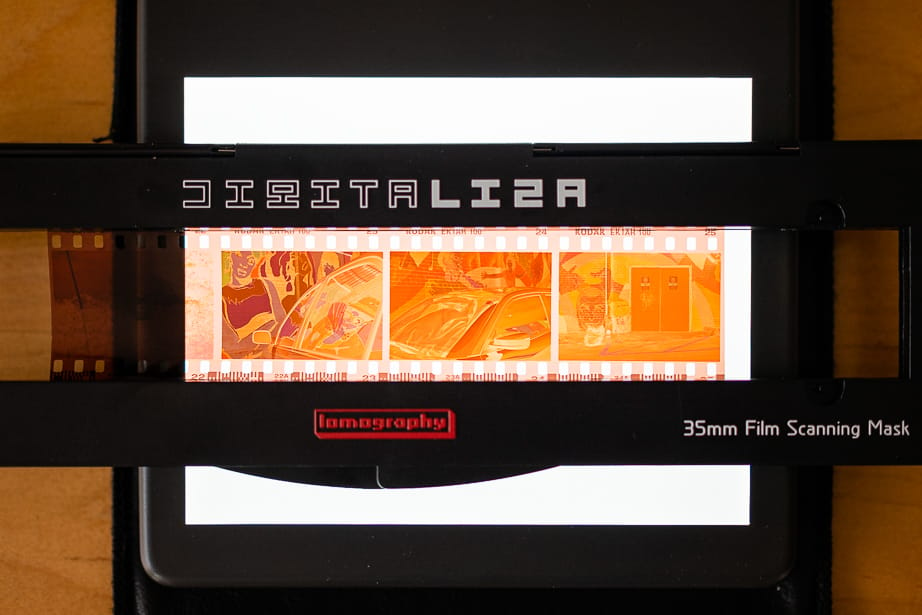
Oh, and don’t forget an air blower to get rid of pesky dust particles and hair from your negatives. You won’t believe how annoying it is to remove dust spots in Lightroom and how much dust and hair can cling to film even in a relatively clean environment. Blow often and kill that debris with extreme prejudice.
The Setup
So, once you have all the items above, you can get to scanning. You’ll place the film strip in the scanning mask, lay it on the light table and then set up the tripod and camera above it all.
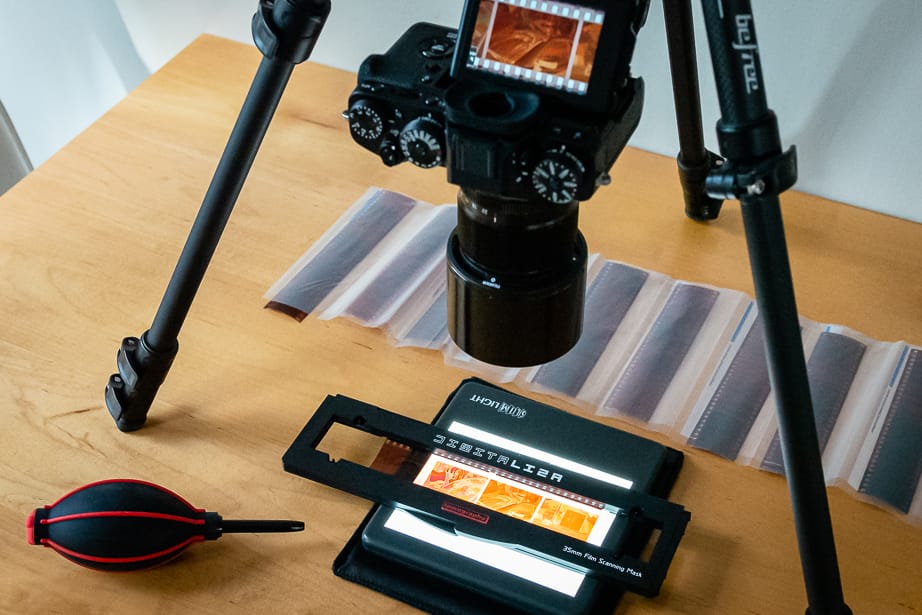
The film should sit flat in the mask, so you don’t need a deep depth of field to get the whole thing in focus. However, it is best to shoot at your lens’ sweet spot—the f-stop at which it is the sharpest. This is often a couple stops down from its maximum aperture, so if you have an f/4 lens, the sweet spot is probably around f/7.1 or f/8. When in doubt, shoot between f/8 and f/11 and you should be good to go.
You’ll want to keep your ISO at its lowest setting (usually around 100 or 200) to guarantee low noise levels, so it’s likely that you’ll have to set a pretty slow shutter speed (below 1/30th of a second) to get a good exposure. This is where a sturdy tripod comes in handy. You can still get some camera shake when firing the shutter button, so if you can, use a cable release or remote to take the shot. If you don’t have either one of those, set a self-timer for at least a few seconds, so your camera will have time to stabilize after you push down the shutter button.
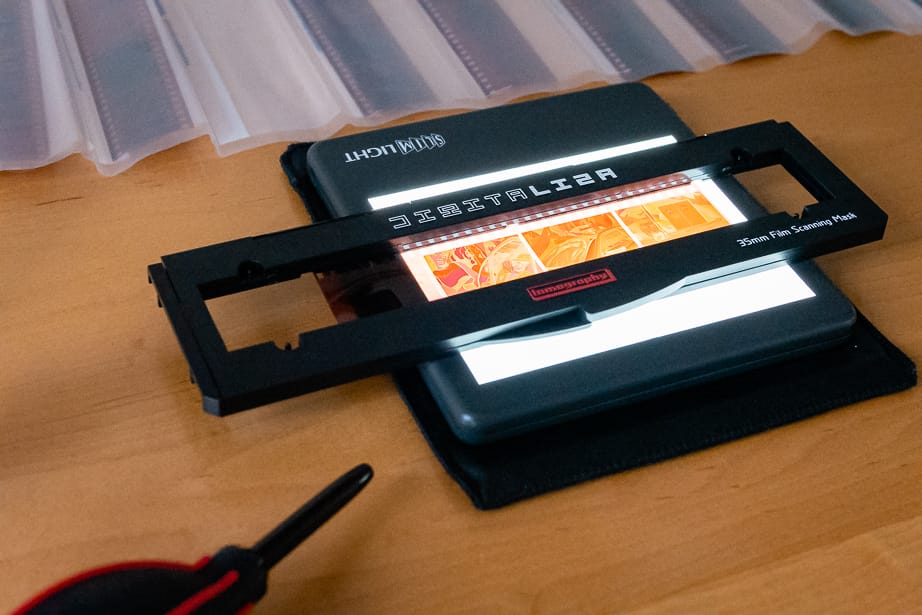
Use manual focus to make slight adjustments between frames. In this video from Retro Pixel, the host shows you his setup and how he focuses his shots. For best results, you want to focus on the grain of the film.
Post-Processing
Once you have digital shots of your film, you’ll have to do some post-processing, especially if you scanned negative film. You could take your files into Photoshop and fine tune the colors like in the Retro Pixel video above, or you can do what I do and use an Adobe Lightroom plug-in called Negative Lab Pro. I love this tool, and it makes my negatives look amazing and true to the film stock. Here’s a short video showing you a quick look at powerful program.
When you import your image into Lightroom, all you need to do is crop it, adjust the white balance, and then use Negative Lab Pro to flip the image from the negative. Once you have it fine-tuned to your liking, it’ll create a TIFF file, which you can further edit within Lightroom before exporting.
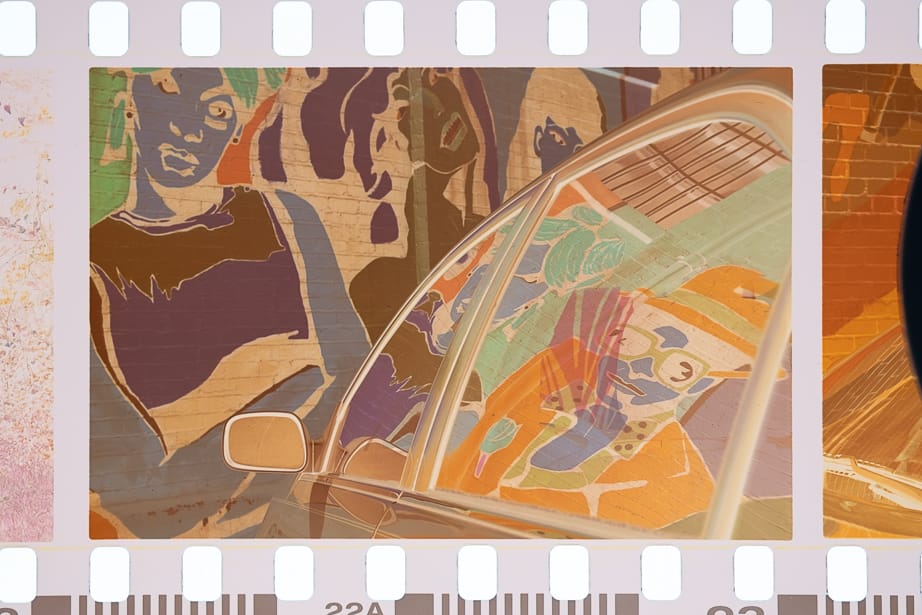
Original camera scan of the Kodak Ektar film
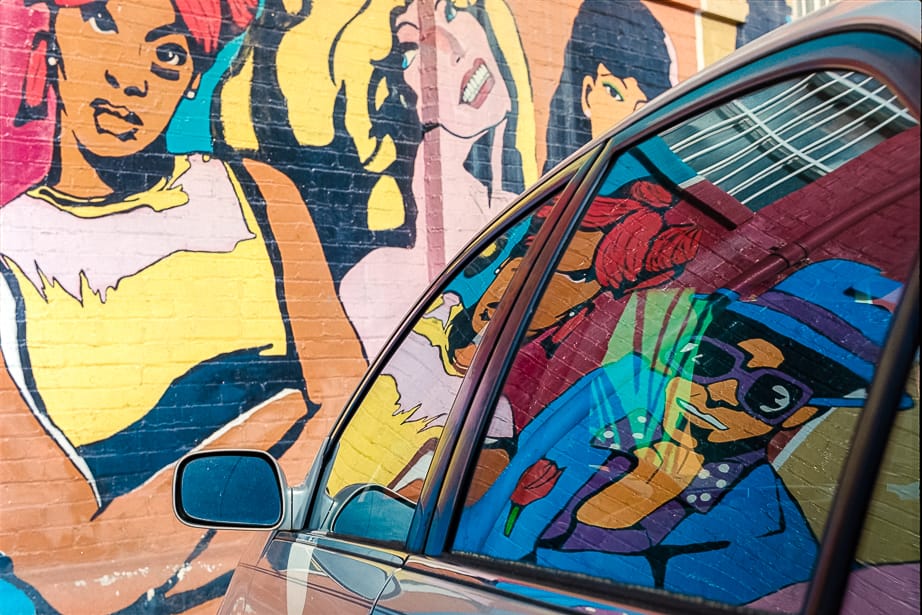
Finished product after converting with Negative Lab Pro and adjusting with Lightroom
It’s that easy—you’ll be cataloging and sharing your film photos in no time with this simple setup, and it’ll have you looking at more film cameras to add to your collection, which is pretty convenient since we’ve got the biggest collection of used film gear in the world.

